How to make Henna Tattoo


Background
Henna is 6,000 years old product, which came from Ancient Egypt. It has been used for many centuries in India, Middle East, and Africa.
Women in Middle East apply henna to their hands and nails to demonstrate feminism and distinguish their hands from the hands of men.
In 1574 BCE of Ancient Egypt, it has been reported that the mummy of Henttimehu hair had been dyed bright red with henna.
1800’s have also seen Europe craze about henna and use it to highlight their hair as a fashion accessory. Lucille Ball of the popular show, “I Love Lucy” also used to henna rinse her hair. Henna gained popularity in Eastern cultures among young people in 1960s.

Introduction
The word “henna” is an Arabic name. It is a green flowering plant that produces a red orange dye molecule. This molecule has an affinity for bonding with protein, and it dyes skin, hair, fingernails, leather, silk, and wool.
Henna leaves are plucked from the plant; crushed with a mildly acidic liquid and dried to make a powder. This powder henna is shifted for any particulates and a paste is made in order to apply to the skin. The paste migrates into the outermost layer of the skin and forms a bond with protein and makes the skin red brown.


How to make a Henna tattoo
-
Make a henna paste
-
Make a Cone to put the henna paste
-
Make a Stencil on the Body part of your choice
-
Outline the Stencil with henna in the cone

1. How to Prepare Henna Paste
The Tools and Materials needed to make the Henna Paste:
- Henna Powder (one ounce decorates six people's hands)
- A few ounces of black tea leaves
- Two lemons or limes
- A tea strainer
- A spoon
- A bowl to make the henna paste

Method to make a henna paste
Step 1: Sift henna powder using a tea strainer.
Step 2: Squeeze lemon or lime, through a strainer, into the henna to make a paste. Stir the paste well.
A general rule is that when more lemon or lime added, the mixture gets more acidic and the paste when applied gives a dark stain.
Step 3: Boil a teaspoon of Tealeaves with 1 Cup of water, until the water level becomes a few ounces. Strain the tealeaves from the tea water. Add tea water to henna and stir it with the spoon to make it a semi solid paste. Cover the paste overnight for the color to develop.

Methods to apply the henna paste
The different ways to apply henna paste:
- Toothpick used, to dip into the henna paste and carefully place the design on bit by bit.
- Squeeze bottles with caps and easy squeeze action allows them to dispense the henna paste on any body part.
- Cones made at home which would be inexpensive, less messy and they are disposable.

How to make cones to put henna paste in it
Materials needed:
- Small freezer bags, one bag will make 2 cones
- Scissors
- Scotch tape
- Twist ties/Rubber band

Method to make a cone
Step 1: Cut one freezer bag into 6” squares.
Step 2: Make a funnel shape out of a square by wrapping the square around itself in such a way that completely overlaps leaving no open spaces for the paste to squeeze out.
Step 3: Tape along the side edges of the cone where the plastic overlaps. Be careful not to move the plastic while taping the cone. Tape the funnel from the bottom to the top.
Step 4: Fill the cone with the henna paste using a small spoon that can go into the cone easily. Place the spoonful of henna paste into the cone and press your finger lightly against it (from the outside) to remove the paste from the spoon and then remove the spoon from the cone. Repeat until the cone is about half full. Filling too much can cause the cone to burst due to excessive squeezing.
Step 5: Close the cone by twisting the bag in the direction of the overlapping fold. Secure it with a twist tie or a rubber band. Cut a small hole at the tip of the cone, and the cone is ready to use. This cone is similar to the cone used for decorating a cake.

A word of Caution
Henna stains very quickly and it is very difficult to erase mistakes, thus the best way is to first draw the design on paper.
Once the design is on paper, there are two options: one can design freehand using a water-based marker and trace over it with henna OR one can one can make stencils by tracing the design and transferring the pattern on the skin.

How to make a Stencil
Materials needed:
- Transfer paper
- Speed Stick Gel deodorant
- Pen
Method to make Stencil
Start with the selection of the image. Make a copy of the image.
Take a transfer paper and tape the image to the transfer paper so it does not slip around as you are tracing the image.
Using a pen to trace the image.
Press firmly to ensure the transfer of the image through all the layers of paper.
When the tracing is completed, cut around the stenciled area.

Method to create a design on any body part
Clean the skin with soap and warm water. Apply the gel to moisten the skin. Transfer the stencil on the skin.
Gently place the transfer paper on the skin in the desired location.
Rub the paper across the skin transferring the image from the paper on to the body.
Peel the paper off to reveal the image on the skin.
Apply henna using a cone on the outline of the design traced.

Decorating with Henna
Below are the basic steps for decorating a body part with henna.
1. Select the body part where henna wants to be applied.
2. Scrub skin with soap and warm water, then rub the area with alcohol to remove any lotion and the body' natural oils.
3. Apply the design by drawing with a water-based pen OR apply the stencil on the selected body part.
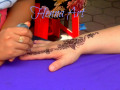
4. Apply the henna by gently squeezing the cone.
5. Let the henna dry
6. Make a solution of sugar and lemon. Dab a piece of cotton in the above solution and apply lightly on the designs so it further darkens to a reddish brown hue that can last for weeks.
7. After a couple of hours, wash off that body part with plain water. Your body part will have that beautiful brown tattoo for several weeks.
Henna can be applied on ankle, wrist, arm, waist, hand, legs, feet.

- Karvachauth
This hub talks about one of the Hindu traditions where there is love and admiration for the better half in their lives. With Valentine approaching, this could be the BEST tip ever!
Which tattoo would you prefer?
Conclusion
With a little bit of imagination creating your own henna pattern is very simple.
It does not require artistic skills.
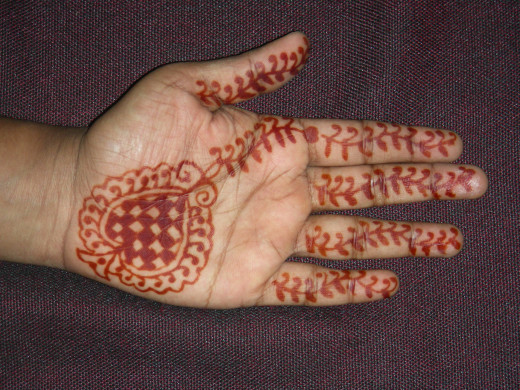
Most henna patterns are very simple shapes such as circles, triangles, and lines. Combine these shapes to create an intricate pattern and a beautiful henna design.
Enjoy your Henna Tattoo, which is a temporary tattoo and lasts approximately ~2 weeks.

")


